In Part 1 I covered OS migration from FirePOWER services to the Firepower Thread Defense (FTD) device. Next step is to join it to Firepower Management Center (FMC).
On sensor execute:
> configure manager add <IP address>
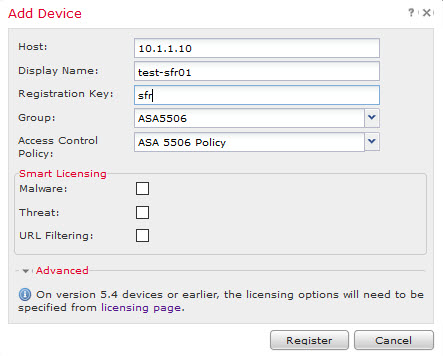
On FMC add it under Device Management. FTD sensor uses Smart Licenses. Before Smart License can be assigned to the sensor, it needs to be authorized on FMC under System > Licenses > Smart Licenses. Smart License enablement is a multistep process (I’ll cover it in a separate post), but luckily there is a one click “Evaluation mode” that lasts 90 days.

Once Smart License mode is enabled you may notice that your Classic License option disappeared from device configuration screen. There is a simple way to get around it if you still have classic licenses to assign.

In Evaluation Mode, you can start assigning licenses to the device. All capabilities (Control, Malware and URL Filtering) are available during evaluation.
Once your sensor is successfully added to FMC, you can proceed with configuration and policy assignment.
Under Device Management first, configure Interfaces. There you will assign Logical Name (the old nameif), Security Zones and IP addresses.
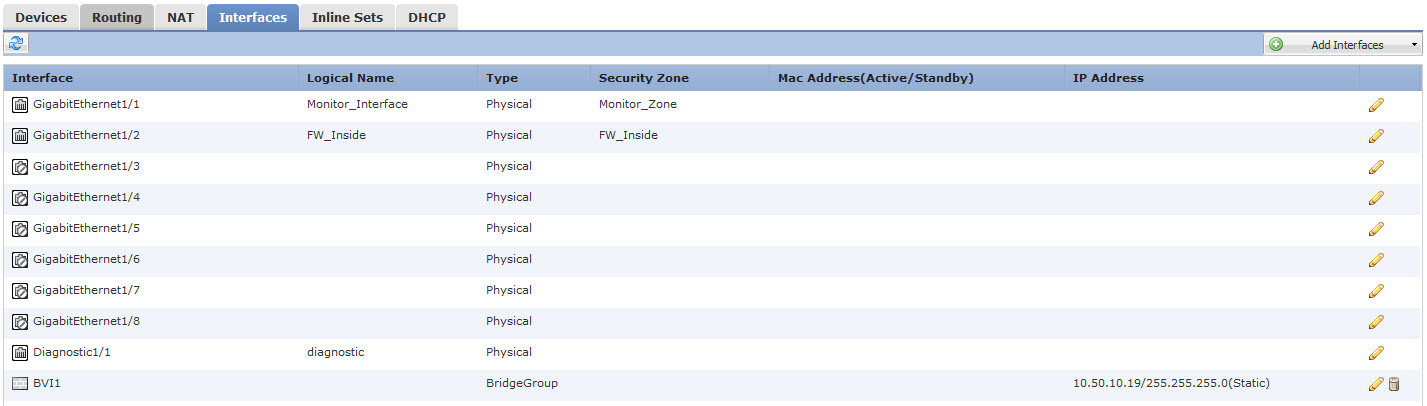
When FTD is in transparent mode, IP address is not an option for the physical interface, so create BVI interface for IP assignment. This interface can be used later to access firewall CLI. Firewall mode can be changed on sensor CLI with “configure firewall” command.
> configure firewall
routed Change to routed firewall mode
transparent Change to transparent firewall mode
Next, configure Routing so you can access new interface and route traffic to it.

Routing table does not affect Management interface routing. As a matter of fact, Management interface is not visible anywhere in FMC.
The Management logical interface is separate from the other interfaces on the device. It is used to set up and register the device to the Firepower Management Center. It runs a separate SSH server and uses its own local authentication, IP address, and static routing.
Create new System Policy under Devices > Platform Settings. ASA FirePOWER system policy can not be applied to FTD sensor. FTD policy is more advanced and contains settings for External Authentication, Management Protocol, Syslog etc.
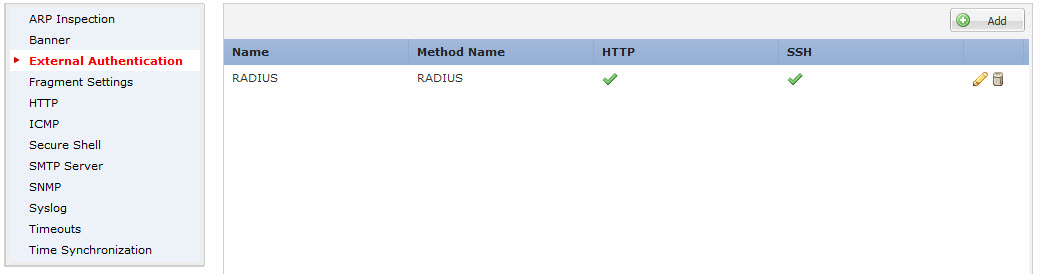
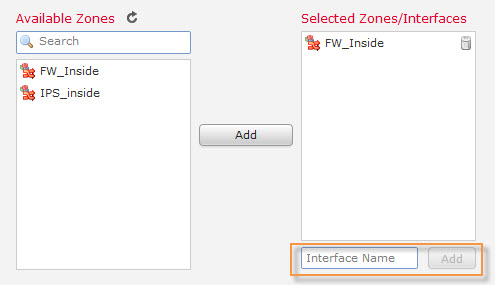
SSH and HTTP access need to be specifically allowed per Zone or Interface.
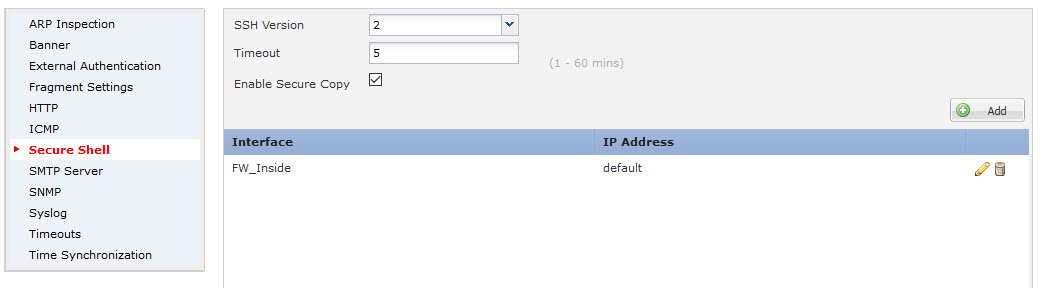
If you need to specify access on more than one interface use Zones, for a single interface type the name in the box.
Apply Health Policy under System > Health > Policy > Apply (green check mark). Legacy health policy is compatible with FTD sensor.
Apply Threat Defence Policies under Policies tab. You can assign existing FirePOWER policies to the sensor.
Save and Deploy settings. If any inconsistencies you will receive an Error similar to this one.
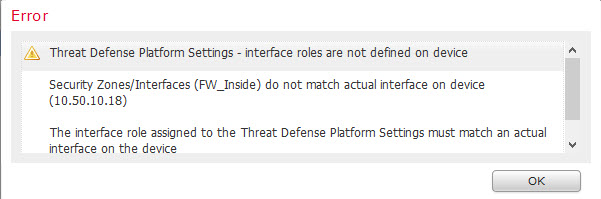
After initial deployment, it makes it a bit hard to go back and change Interface names or Zones so do proper planning prior to configuration.
System Policy controls access to Firepower firewall CLI console which appears to have very limited functionality. I was able to access it only over SSH and only with External Authentication enabled. CLI has many similarities to ASA but with configuration and logging mode being disabled.

Funny enough FMC has device interface feature to detect out of band changes.

Not sure how these changes can be made without access to CLI configuration mode. Perhaps more functionality will be unleashed in future releases.
To conclude, migration and setup were not too bad overall. Smart Licensing took a bit of time. Other than Firepower Management Center Configuration Guide I found no configuration papers available about FTD at all. Most helpful was the “?” or Help button on FMC.
P.S. To re-image from Firepower Threat Defense to ASA follow this article. You will have to erase disk0: and complete ASA/FirePOWER setup from scratch.